Google's Imageless Buttons
-- EDIT -- I didn't see the link in the original post. Sorry! Will try and re-write to reflect actual question
StopDesign has an excellent post on this here. [edit 20091107] These were released as part of the closure library: see the button demo.
Basically the custom buttons he shows are created using a simple bit of CSS.
He originally used 9 tables to get the effect: 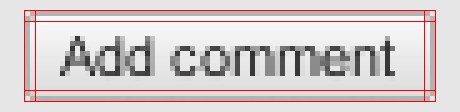
But later he used a simple 1px left and right margin on the top and bottom borders to achieve the same effect.
The gradient is faked by using three layers: 
All of the code can be found at the Custom Buttons 3.1 page. (although the gradient without the image is only working in Firefox and Safari)
Step by Step Instructions
1 - Insert the following CSS:
/* Start custom button CSS here
---------------------------------------- */
.btn {
  display:inline-block;
  background:none;
  margin:0;
  padding:3px 0;
  border-width:0;
  overflow:visible;
  font:100%/1.2 Arial,Sans-serif;
  text-decoration:none;
  color:#333;
  }
* html button.btn {
  padding-bottom:1px;
  }
/* Immediately below is a temporary hack to serve the
   following margin values only to Gecko browsers
   Gecko browsers add an extra 3px of left/right
   padding to button elements which can't be overriden.
   Thus, we use -3px of left/right margin to overcome this. */
html:not([lang*=""]) button.btn {
  margin:0 -3px;
  }
.btn span {
  background:#f9f9f9;
  z-index:1;
  margin:0;
  padding:3px 0;
  border-left:1px solid #ccc;
  border-right:1px solid #bbb;
  }
* html .btn span {
  padding-top:0;
  }
.btn span span {
  background:none;
  position:relative;
  padding:3px .4em;
  border-width:0;
  border-top:1px solid #ccc;
  border-bottom:1px solid #bbb;
  }
.btn b {
  background:#e3e3e3;
  position:absolute;
  z-index:2;
  bottom:0;
  left:0;
  width:100%;
  overflow:hidden;
  height:40%;
  border-top:3px solid #eee;
  }
* html .btn b {
  top:1px;
  }
.btn u {
  text-decoration:none;
  position:relative;
  z-index:3;
  }

/* pill classes only needed if using pill style buttons ( LEFT | CENTER | RIGHT ) */
button.pill-l span {
  border-right-width:0;
  }
button.pill-l span span {
  border-right:1px solid #ccc;
  }
button.pill-c span {
  border-right-style:none;
  border-left-color:#fff;
  }
button.pill-c span span {
  border-right:1px solid #ccc;
  }
button.pill-r span {
  border-left-color:#fff;
  }

/* only needed if implementing separate hover state for buttons */
.btn:hover span, .btn:hover span span {
  cursor:pointer;
  border-color:#9cf !important;
  color:#000;
  }

/* use if one button should be the 'primary' button */
.primary {
  font-weight:bold;
  color:#000;
  }
2 - Use one of the following ways to call it (more can be found in the links above)
<a href="#" class="btn"><span><span><b> </b><u>button</u></span></span></a>
or
<button type="button" class="btn"><span><span><b> </b><u>button</u></span></span></button>
This is their "Archive" Button, according to Firebug.
<div tabindex="0" act="7" class="goog-imageless-button goog-inline-block goog-imageless-button goog-imageless-button-collapse-right goog-imageless-button-primary" id="">
  <div class="goog-inline-block goog-imageless-button-outer-box">
    <div class="goog-inline-block goog-imageless-button-inner-box">
      <div class="goog-imageless-button-pos">
        <div class="goog-imageless-button-top-shadow"> </div>
        <div class="goog-imageless-button-content"><b>Archive</b></div>
      </div>
    </div>
  </div>
</div>
The CSS is more than I care to organize/paste for this. Perhaps it's just me, but when the markup/css become this heavy, I think I would much rather USE AN IMAGE (or a couple images as backgrounds. Better yet, Sprites). Besides, an image for this button would be less than a single K.
As much as I love Google, this seems a bit overkill.
Update: Google is a unique case. If you're a massive site and you wish to internationalize your content, then this image-less technique is actually really cool. It allows you to apply just about any written language to your UI, without needing to generate new images, or fear of breaking your buttons.
See Question: What are the advantages of using an imageless button?
However you decide to do it, make sure you first render the page with the default:
<input type="submit" value="submit" />
... And then use jQuery to swap the input element with your custom button that has an onClick event. This will ensure that people without JavaScript enabled will still be able to use your site.
Usability should come first!
You could use this jquery plugin I've developed. The buttons work pratically anywhere and since it's a plugin they're easy to set up and configure.
http://swizec.com/code/styledButton/